Few things are more frustrating than an unexpected WordPress error. One moment, your site is running smoothly, and the next you're staring at an error message that seems impossible to decipher.
The good news? WordPress is a robust and reliable platform, so errors don't usually happen without a reason. The bad news? When they do pop up, it can feel like you're lost in a maze, especially if you're not sure where to start.
But don't panic! Most WordPress errors are caused by minor issues that can be resolved with some simple troubleshooting. The trick is identifying the root cause and knowing how to fix it.
So, let's get into it! In this guide, we'll walk you through the most common WordPress errors and how to fix them, step by step. By the end, you'll have the confidence to tackle site issues and keep everything running smoothly.
First Things First: Back It Up!
Before making any changes, always create a full backup of your WordPress site. Think of it as an insurance policy you hope you won't need it, but you'll be grateful it's there if something goes wrong. You can use a plugin like Duplicator or follow a manual backup guide to safeguard your content.
DIY Fixes vs. Professional Help
If you're comfortable rolling up your sleeves, many WordPress issues can be fixed with a bit of patience and the right approach. But if the thought of diving into your site's backend makes you break into a cold sweat, don't worry you don't have to do it alone. At Webz Solutions, we offer affordable Emergency WordPress Support Services to quickly tackle plugin conflicts, image display problems, broken links, theme errors, and more. Sometimes, it's worth letting the pros handle the headache so you can focus on what you do best.
Now, let's troubleshoot those pesky WordPress errors and get your site back in business!
How to Resolve WordPress Internal Server Error
Encountering a 500 Internal Server Error on your WordPress site can feel like hitting a brick wall. Your site goes down, visitors are met with a frustrating error message, and you're left scrambling for a solution. But don't worry this issue is common, and with the right troubleshooting steps, you can have your site up and running again in no time.
Understanding the 500 Internal Server Error
A 500 Internal Server Error is a generic message indicating that something has gone wrong on the server, but it doesn't tell you exactly what. This can make troubleshooting a bit tricky, but by identifying common causes, you can narrow down the root issue and apply the right fix.
Common Causes of Internal Server Error
- Damaged .htaccess File - The .htaccess file controls essential server settings, and any corruption or misconfiguration can cause your site to malfunction.
- Insufficient PHP Memory - When your website surpasses the available PHP memory limit, it may lack the resources needed to function properly, leading to errors.
- Plugin Conflicts or Malfunctions - Poorly designed, outdated, or incompatible plugins can create conflicts within WordPress, resulting in site crashes.
- Compromised WordPress Core Files - Corruption in core files due to incomplete updates, accidental deletions, or malware can disrupt site functionality.
- Improper File Permission Settings - If file and folder permissions are not configured correctly, WordPress may struggle to execute scripts, leading to errors.
- Cached Browser Data Issues - Stale or outdated cached content stored in your browser can sometimes interfere with how your website loads, causing unexpected issues.
Step-by-Step Solutions to Fix Server Error
1. Backup Your Website
Before making any changes, always create a full backup of your WordPress files and database. This ensures you can restore your site if anything goes wrong.
2. Clear Your Browser Cache
Sometimes, the issue may not be on the server but within your browser cache. Clear your cache and reload your site to see if that resolves the problem.
3. Check and Reset .htaccess File
- Access your website files via FTP or cPanel.
- Locate the .htaccess file in the root directory.
- Rename it to .htaccess_old and refresh your site.
- If your site loads correctly, go to Settings > Permalinks in WordPress and click "Save Changes" to regenerate the .htaccess file.
4. Increase PHP Memory Limit
If your site runs out of memory, it may crash with a 500 error. Increase the memory limit by:
- Editing wp-config.php
- Adding the following line before /* That's all, stop editing! */:
define('WP_MEMORY_LIMIT', '256M'); - Save the file and refresh your site.
5. Deactivate All Plugins
Faulty plugins often cause server errors. To check:
- Go to wp-content/plugins via FTP.
- Rename the plugins folder to plugins_old.
- Refresh your site-if it works, rename the folder back to plugins and activate plugins one by one to identify the culprit.
6. Switch to a Default WordPress Theme
A poorly coded or outdated theme can cause issues. To test:
- Navigate to Appearance > Themes in WordPress.
- Activate a default theme like Twenty Twenty-Four.
- Check if the issue persists.
7. Verify File Permissions
Incorrect permissions can cause access issues. Use an FTP client to ensure:
- Files are set to 644 permissions.
- Folders are set to 755 permissions.
8. Enable WordPress Debug Mode
Edit wp-config.php and add:
- define('WP_DEBUG', true);
define('WP_DEBUG_LOG', true);
define('WP_DEBUG_DISPLAY', false); - Check the wp-content/debug.log file for error messages.
9. Re-upload Core WordPress Files
If your core files are corrupted:
- Download a fresh WordPress installation.
- Extract and upload the wp-admin and wp-includes folders via FTP, replacing existing files.
10. Check for a Corrupted Database
A damaged database can break your site. To repair it:
- Add this to wp-config.php:
define('WP_ALLOW_REPAIR', true); - Visit yoursite.com/wp-admin/maint/repair.php and follow the instructions.
11. Review Error Logs
Checking your server error logs can provide insights into what's going wrong. You can find them in cPanel > File Manager > error_log or ask your hosting provider.
12. Contact Your Hosting Provider
If you've tried everything and still face issues, your hosting provider may be able to help. They can check server settings, logs, and potential hosting-related problems.
This Site is Experiencing Technical Difficulties
WordPress errors can be frustrating, especially when they leave you in the dark about what's going wrong. One such cryptic issue is the dreaded "This Site is Experiencing Technical Difficulties" message. This error can be triggered by any number of fatal issues, from plugin conflicts to memory limits, making it tricky to diagnose without proper access to error logs or WordPress notifications.
A common obstacle when troubleshooting is not receiving WordPress emails. If your admin email address is incorrect or WordPress notification emails aren't reaching your inbox, it becomes significantly harder to pinpoint the exact issue. Missing these critical alerts means you might not even realize your site is down until a frustrated visitor or client informs you.
The simplest and most effective way to resolve this is to verify your WordPress admin email. Navigate to your WordPress dashboard (if accessible) and check the email settings under "General Settings." Ensure the address is correct and capable of receiving messages. If you're locked out of the dashboard, you may need to update the admin email directly in your database using phpMyAdmin. Additionally, configuring an SMTP plugin can help ensure that WordPress notification emails are reliably delivered instead of getting lost in spam filters.
Keeping your admin email updated and using proper email delivery methods can save you hours of troubleshooting. A little proactive maintenance goes a long way in keeping your site running smoothly and ensuring you're always informed of potential issues before they escalate.
Resolving the 'Error Establishing a Database Connection' Issue in WordPress
Seeing the dreaded "Error Establishing a Database Connection" message on your WordPress site can be alarming, especially if you're unsure of the cause. This error essentially means that your website is unable to communicate with the database, which stores all your crucial content, user information, and settings. Without that connection, your site simply won't function.
For beginners, troubleshooting this issue can feel overwhelming. The most common reason for this error is incorrect database credentials-your database host, username, or password might have been changed or entered incorrectly. However, other potential causes include an unresponsive database server or even corruption within the database itself.
If you've recently modified your database details, double-check the accuracy of the credentials in your wp-config.php file. Incorrect information here is the primary culprit behind this issue. If your database server is down due to high traffic or hosting problems, reaching out to your web host for assistance may resolve the issue. In cases of database corruption, using WordPress's built-in repair tool or restoring a backup can help get things back on track.
Understanding how WordPress connects to its database and keeping your credentials secure can prevent this issue from occurring in the future. Regular maintenance and reliable hosting play a crucial role in ensuring your website remains stable and accessible.
Resolving the WordPress White Screen of Death
One of the most frustrating WordPress errors you can encounter is the White Screen of Death (WSoD). Unlike other issues that display error messages, the WSoD simply leaves you staring at a blank white screen with no clues about what went wrong. It's like trying to solve a mystery with no evidence.
The most common cause of this error is when a script exceeds the PHP memory limit, preventing WordPress from loading properly. It can also result from a misconfiguration on the server, a faulty plugin, or even a theme conflict. Sometimes, the issue affects only specific sections of your site, making it even trickier to diagnose.
If you're facing the WSoD, don't panic. Here are a few effective troubleshooting steps to help you get your site back up and running:
- Disable Plugins: Since faulty plugins are often the primary culprit, try disabling all plugins via SFTP or your hosting control panel. Then, reactivate them one by one to identify the problematic one.
- Switch to a Default Theme: A corrupted or incompatible theme can also trigger the WSoD. Replace your active theme with a default WordPress theme (such as Twenty Twenty-Four) and check if the issue resolves.
- Enable Debug Mode: WordPress has a built-in debug mode that can provide error messages and point you toward the root cause. To enable it, add define('WP_DEBUG', true); to your wp-config.php file.
- Clear Cache: If you use a caching plugin or a CDN, outdated files might be causing the problem. Clear your cache to ensure you're seeing the latest version of your site.
- Increase PHP Memory Limit: If your site is running out of memory, you can increase the limit by editing your php.ini file or adding define('WP_MEMORY_LIMIT', '256M'); to your wp-config.php file.
- By methodically working through these steps, you can often identify and fix the issue without needing to reinstall WordPress or lose any data. If all else fails, reaching out to your hosting provider for server-side troubleshooting is a good next step. Keeping your site well-maintained and regularly backed up can also prevent future occurrences of the White Screen of Death.
403 Forbidden Error
Imagine trying to access a page on your website maybe an important blog post, an admin panel, or even your homepage only to be met with a 403 Forbidden error. It's a frustrating experience, especially when you have no idea what went wrong. Unlike other WordPress errors, this one doesn't always come with a clear explanation, making troubleshooting a bit tricky.
What Causes the 403 Forbidden Error?
At its core, a 403 error means the server is denying access to a particular page or resource. WordPress, like any secure system, uses permissions to control who can access specific files and directories. However, when these permissions are misconfigured, even an authorized user (like you) might be locked out.
The most common reasons for a 403 error include:
- Incorrect file permissions - Your server may be blocking access to certain pages due to permission settings.
- A corrupted .htaccess file - This critical file controls how WordPress interacts with your server. If it's damaged or has incorrect rules, it can prevent access.
- Security plugins - Overzealous security plugins sometimes block access to legitimate users or mistakenly trigger a false alarm.
- Hotlink protection settings - If enabled incorrectly, these can prevent access to certain files like images and scripts.
How to Fix the 403 Forbidden Error in WordPress
1. Reset Your .htaccess File
Since the .htaccess file often causes 403 errors, the first step is to reset it:
- Access your site via FTP or your hosting file manager.
- Locate the .htaccess file in the root WordPress directory.
- Download a backup copy, then delete the original file.
- Log into your WordPress dashboard and navigate to Settings > Permalinks.
- Without changing anything, click Save Changes-WordPress will generate a new .htaccess file automatically.
After this, refresh your site and check if the error is resolved.
2. Check File and Directory Permissions
Every file and folder on your site has permission settings that dictate who can read, write, or execute them. If these are incorrectly set, your server may block access.
Here are the recommended permissions:
- Files should be set to 644
- Folders should be set to 755
You can adjust these settings using an FTP client or your hosting control panel. If unsure, ask your hosting provider for assistance.
3. Disable Security Plugins
Some security plugins, while useful, can be overly aggressive and block legitimate access. To check if a plugin is causing the issue:
- Deactivate all security plugins.
- Try accessing your site again.
- If the error disappears, reactivate plugins one by one to find the culprit.
If a plugin is responsible, check its settings or consider replacing it with a more flexible alternative.
4. Contact Your Hosting Provider
If none of the above solutions work, your web host may have mod_security rules or other restrictions in place. A quick chat with their support team can help identify and fix the issue.
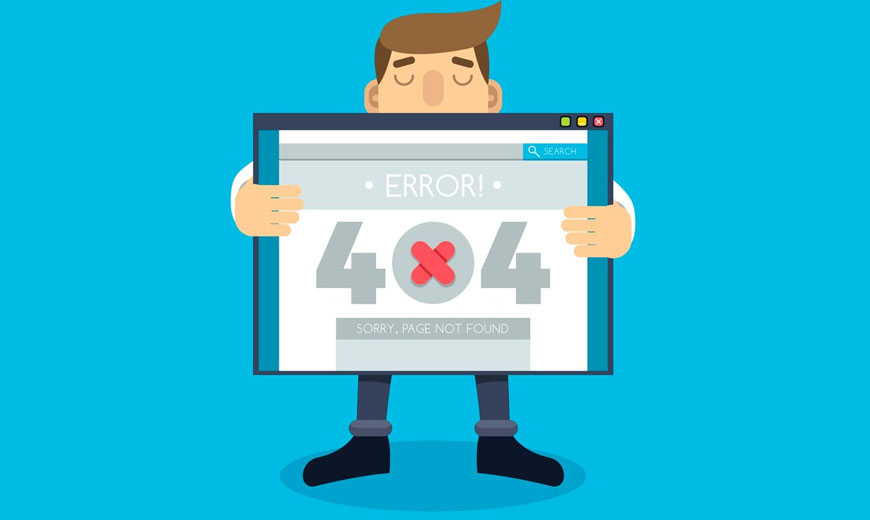
404 Not Found Error
Imagine clicking on a blog post you've carefully crafted, only to be met with the dreaded "404 - Page Not Found" error. Frustrating, right? Your homepage, category pages, and even the WordPress admin panel might work fine, but specific posts or pages stubbornly refuse to load. This common issue can negatively impact user experience and SEO rankings, making it crucial to fix it as soon as possible.
Why Do WordPress 404 Errors Happen?
In most cases, this error occurs due to broken permalinks-a misconfiguration in how WordPress structures your URLs. A corrupted .htaccess file is often the main culprit, but incorrect rewrite rules or changes in URL structures can also trigger the problem.
How to Fix WordPress 404 Errors
1. Reset Your Permalink Settings
The quickest and easiest solution is to reset your permalinks:
- Go to your WordPress dashboard.
- Navigate to Settings > Permalinks.
- Without making any changes, click Save Changes to refresh the permalink structure.
This simple step resolves most 404 errors by forcing WordPress to update its URL routing rules.
2. Manually Update Your .htaccess File
If resetting permalinks doesn't work, you may need to manually regenerate your .htaccess file:
- Connect to your site via FTP or cPanel File Manager.
- Locate the .htaccess file in the root directory (if you don't see it, enable "Show Hidden Files" in your file manager settings).
- Download a backup copy, then delete the file.
- Create a new .htaccess file and paste in the default WordPress rules:
apache
CopyEdit
# BEGIN WordPress
RewriteEngine On
RewriteBase /
RewriteRule ^index.php$ - [L]
RewriteCond %{REQUEST_FILENAME} !-f
RewriteCond %{REQUEST_FILENAME} !-d
RewriteRule . /index.php [L]
# END WordPress - Save the file and upload it back to your server.
This should reset WordPress's URL handling and fix the 404 error for your posts and pages.
3. Check for Plugin or Theme Conflicts
Occasionally, a poorly coded plugin or theme may interfere with URL structures. To troubleshoot:
- Deactivate all plugins, then check if your pages load correctly.
- If the issue is resolved, reactivate plugins one by one to identify the problematic one.
- If plugins aren't the issue, switch to a default WordPress theme (like Twenty Twenty-Four) to see if your theme is causing the problem.
500 Error
Few things are as frustrating as a 500 Internal Server Error. You open your WordPress site, expecting it to load smoothly, but instead, you're greeted with a vague message: Internal Server Error. No further explanation, no clear direction-just a dead end.
If you've encountered this error, don't worry. It's a common issue, and while it may seem mysterious at first, there are a few well-known causes and straightforward solutions.
Common Causes
- Corrupt .htaccess file - A misconfigured file can disrupt site functionality.
- Memory limit exceeded - If WordPress runs out of allocated memory, it may crash.
- Faulty plugins or themes - A recent update or installation might be conflicting.
- Server issues - Sometimes, the problem is with your hosting provider.
Quick Fixes
- Reset .htaccess - Rename the .htaccess file via FTP and generate a new one by saving permalinks in WordPress settings.
- Increase PHP Memory Limit - Edit wp-config.php and set define( 'WP_MEMORY_LIMIT', '256M' ); to allocate more memory.
- Disable Plugins & Themes - Rename the plugins folder via FTP to see if a plugin is the culprit. If not, try switching to a default theme.
- Check with Your Host - If none of the above work, contact your hosting provider for assistance.
Briefly Unavailable for Scheduled Maintenance" Error in WordPress
Seeing the "Briefly Unavailable for Scheduled Maintenance" message can be frustrating, especially if you're in the middle of an important update. This error occurs when WordPress is interrupted during an update-whether due to a slow server, connection timeout, or an issue with plugins or themes.
During any update, WordPress automatically enters maintenance mode, but if the process doesn't complete properly, it can get stuck, locking you (and your visitors) out of the site. The good news? Fixing it is simple.
To resolve this, connect to your site via FTP, locate the .maintenance file in your root directory, and delete it. This should instantly bring your site back online. If updates are still incomplete, try running them manually to avoid future interruptions.
Resolving the "Too Many Redirects" Issue in WordPress
Few WordPress errors are as frustrating as the dreaded "Too Many Redirects" issue. One moment, your site is running smoothly; the next, you're caught in an endless loop, with your browser bouncing between pages until it finally gives up.
This error typically stems from a misconfiguration in your site's redirection settings. WordPress itself uses a built-in redirection function for SEO-friendly URLs, and many plugins-especially caching and SEO tools-also rely on redirection rules. If something goes wrong, your site can get stuck in a loop, sending visitors back and forth between URLs without ever loading the actual page.
To fix this, start by clearing your browser cookies and cache, as outdated data can sometimes trigger the issue. Next, disable all plugins and reactivate them one by one to identify the culprit. If that doesn't work, check your WordPress site URL settings in Settings > General and make sure both the "WordPress Address (URL)" and "Site Address (URL)" are correctly configured.
Still stuck? Try renaming your .htaccess file to force WordPress to generate a fresh one, or manually adjust your redirection rules in the database. With a little troubleshooting, you can break the loop and get your site back on track.
Fixing the Upload: Failed to Write File to Disk Error in WordPress
Running into the "Failed to Write File to Disk" error while trying to upload images or media in WordPress can be frustrating. This issue usually stems from incorrect file permissions on your server, preventing WordPress from saving new files.
Every file and folder on your website has specific permissions that dictate who can read, write, and execute them. If these permissions are misconfigured, your web server may block WordPress from adding new content, leading to this error.
To fix it, you'll need to adjust the folder permissions via FTP or your hosting control panel. Ensuring that WordPress has the correct write access will restore your ability to upload files seamlessly. If the issue persists, checking your hosting disk space or temporary file settings may also help resolve the problem.
Resolving the This Site Ahead Contains Harmful Programs Error in WordPress
Seeing the dreaded "This Site Ahead Contains Harmful Programs" warning on your WordPress site can be alarming. It's Google's way of protecting users from potential malware or phishing threats. But what does it actually mean for you as a site owner?
In most cases, this warning appears when Google detects suspicious code on your site, often injected by hackers who exploit vulnerabilities to distribute malware. If your site has been compromised, attackers might use it to spread harmful software, steal data, or redirect visitors to malicious websites.
Another overlooked cause? Low-quality ad networks. If you're running ads from unreliable sources, they might serve up links to dangerous sites, triggering Google's security warning.
To fix this, you need to act fast. Scan your site for malware, remove any infected files, and ensure your plugins, themes, and WordPress core are up to date. If you're running ads, stick to reputable networks. Once you've cleaned up, submit your site for a Google review to get the warning removed.
A hacked site can damage your reputation and tank your search rankings, so staying proactive with security is key. Regular updates, trusted plugins, and strong security measures can help keep your site safe from future threats.
Resolving the Fatal Error: Maximum Execution Time Exceeded in WordPress
If you've ever encountered the Maximum Execution Time Exceeded error in WordPress, you know how frustrating it can be. One moment, you're updating a theme, installing a plugin, or running a script, and the next, your site is throwing an error that halts everything.
This issue arises because WordPress runs on PHP, which has built-in execution time limits to prevent poorly coded scripts from overloading the server. Some web hosting providers set generous limits, while others impose stricter constraints. If a script takes too long to execute-whether due to a complex operation, an update delay, or server restrictions-WordPress will stop the process and trigger this error.`
The good news? It's fixable. You can extend the execution time by tweaking your .htaccess file or adjusting PHP settings, ensuring your site runs smoothly without interruptions. If the issue persists, switching to a more flexible hosting provider may be the best long-term solution.
Resolving the Failed to Open Stream Error in WordPress
The "Failed to Open Stream" error in WordPress can feel cryptic, but at its core, it simply means WordPress is trying to access a file and failing. Sometimes, the error is just a warning, and your site continues to load. Other times, it results in a full-blown fatal error, bringing your site to a halt.
The message itself varies depending on the cause. You might see reasons like "permission denied" (indicating a file can't be accessed due to incorrect permissions) or "no such file or directory" (meaning WordPress is looking for something that doesn't exist). Regardless of the specifics, the key is identifying where the issue originates-whether it's a missing theme or plugin file, an incorrect path, or a server-related restriction-so you can take the right steps to fix it.
Resolving the 429 Too Many Requests Error in WordPress
The 429 Too Many Requests error is a safeguard designed to prevent excessive strain on a server. It kicks in when a user, bot, or script bombards the site with too many requests in a short time. While this helps protect against abuse, it can sometimes misfire-blocking legitimate users, search engines, or essential services from accessing your website.
The tricky part is identifying what's causing the overload. It could be an aggressive plugin, a misconfigured API, or even a bot crawling your site too aggressively. To resolve the issue, start by disabling plugins one by one to pinpoint the culprit. If the problem persists, check with your hosting provider to see if rate limits are too strict. Keeping an eye on your traffic logs can also help identify unusual activity.
Addressing the 429 error quickly ensures that your site remains accessible to real visitors while keeping unnecessary server strain at bay.
Resolving File and Folder Permissions Errors in WordPress
File and folder permissions might not be the first thing on your mind when running a WordPress site, but they play a crucial role in keeping everything functional. If these permissions are incorrect, you might run into issues like being unable to upload media, install plugins, or even access your site properly.
Most hosting providers set the correct permissions by default, but things can go wrong-whether due to a server migration, a security plugin tweak, or an accidental change. The good news? You can fix this easily using an FTP client. By adjusting folder permissions to 755 and file permissions to 644, you restore proper access while keeping your site secure.
Think of file permissions as setting boundaries-just like locking your doors at night. When configured correctly, they allow WordPress to function smoothly while keeping unauthorized access at bay.
How to Fix Your Connection is Not Private Error
Few things are as alarming as seeing "Your connection is not private" when trying to access your website. This error occurs when a browser fails to validate your site's SSL certificate, preventing visitors from reaching your content. Since most users won't proceed past the warning, this can lead to a significant drop in traffic and damage your brand's credibility.
The tricky part? Figuring out what's causing it. The issue could stem from an expired SSL certificate, a misconfigured server, or even an outdated browser. Sometimes, the problem isn't even on your end-visitors using public Wi-Fi networks with strict security policies may also trigger the warning.
To fix this, start by checking your SSL certificate's validity and renewing it if necessary. If the certificate is active, ensure your WordPress site correctly enforces HTTPS and that there are no mixed content issues. Clearing your browser cache, updating plugins, and verifying server settings can also help.
Your website's security is non-negotiable, and resolving this error quickly ensures a seamless, trustworthy experience for your visitors.